How to take better photos—whether you’re using your phone or a fancy camera, the goal stays the same: you want your shots to look good. But sometimes, you take a photo, look at it later, and think, “It’s okay, but it could be better.” That’s where this guide comes in. No matter what kind of camera you’re using, a few simple tips can help you level up your photography. We’re talking practical stuff like composition, lighting, and settings—things you can apply straight away, no photography degree needed.
Understanding Your Camera
Before you dive into snapping better photos, it helps to know what you’re working with. Cameras can range from the one in your pocket (your smartphone) to a more advanced DSLR or mirrorless camera. You don’t need the latest or greatest gear to take a great shot, but understanding how your camera works can make a huge difference.
Types of Cameras
Smartphones are surprisingly powerful, and many come with features like portrait mode and night mode that do a lot of the heavy lifting for you. If you’re using a DSLR or mirrorless camera, you get more control over things like lens choice and manual settings, but they require a bit more know-how.
Key Features
Here’s where things get a little technical, but bear with me—it’s worth it. Understanding aperture, shutter speed, and ISO will change the way you take photos:
- Aperture: This controls how much light hits your camera’s sensor and affects the depth of field. A low number (like f/1.8) will blur the background, while a higher number (like f/11) keeps more in focus.

This photo was taken at an aperture of f/4, causing the background to be out of focus
- Shutter Speed: Faster speeds freeze motion, while slower ones can create motion blur—perfect for capturing a waterfall in action.
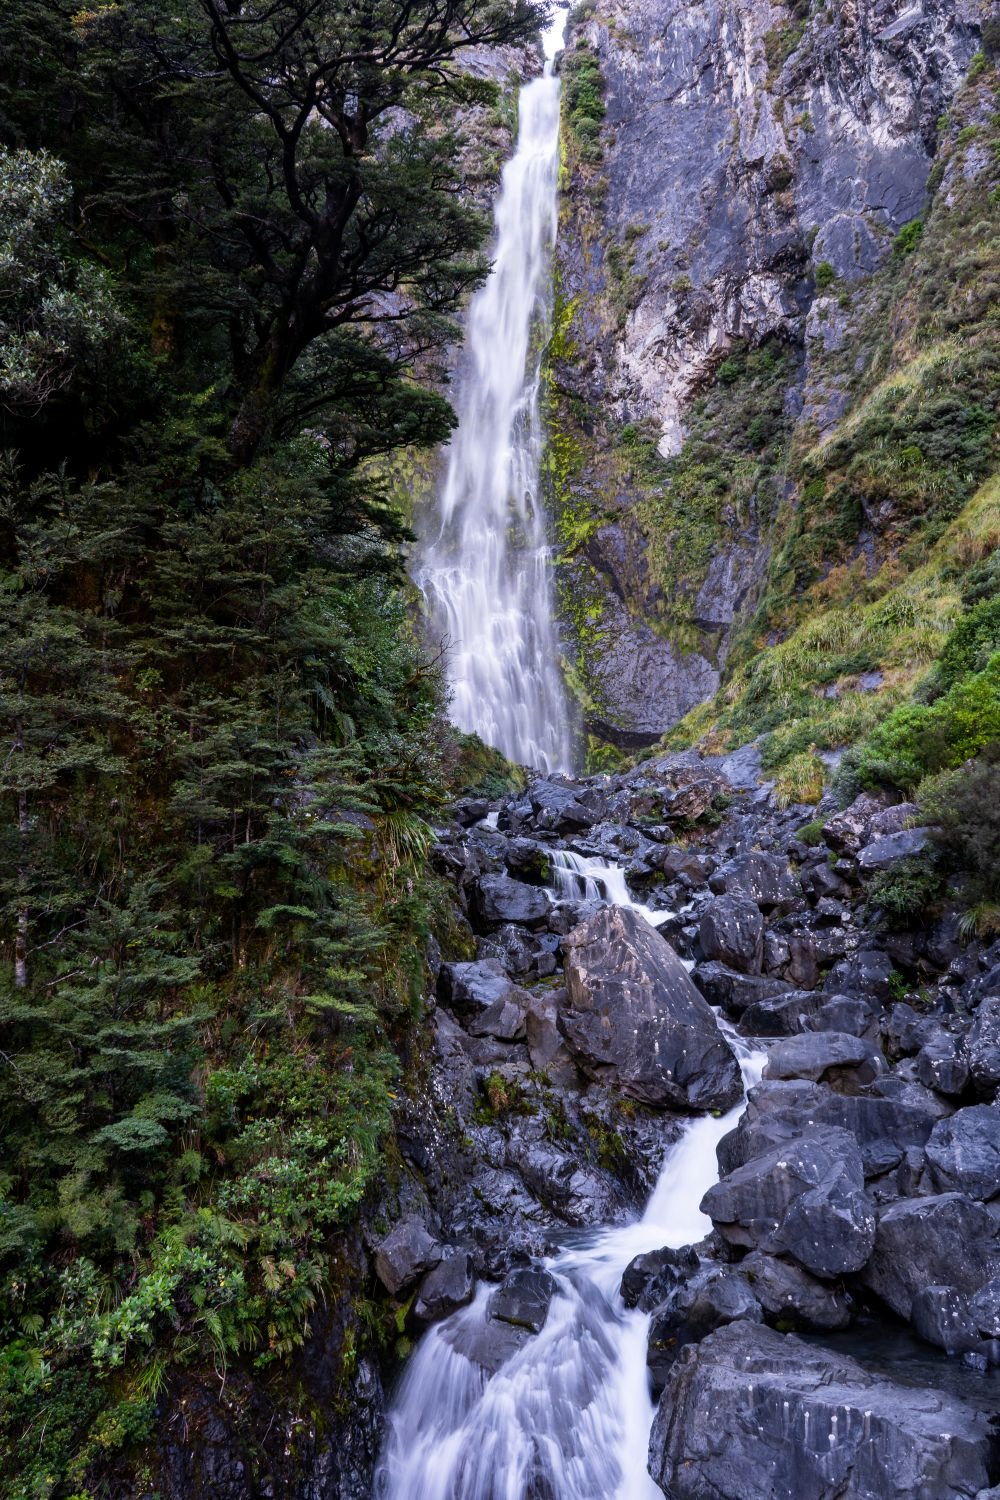
We used a shutter speed of 1/5 sec for this photo to get that motion blur effect on the waterfall
- ISO: This controls how sensitive your camera is to light. Low ISO keeps your image crisp, while high ISO can help in low light but might add grain.
Manual vs. Auto Mode
If you’re just starting, auto mode can be your best friend. It takes care of all the settings for you. But once you get the hang of things, try manual mode for more control. This lets you adjust the aperture, shutter speed, and ISO to suit your scene. It sounds complicated, but with a little practice, it opens up a lot of creative possibilities.
Mastering Composition
Now that you’ve got a handle on your camera, let’s talk about composition. Composition is basically how you arrange everything in your shot, and it can turn an average photo into something much more eye-catching. The good news? You don’t need fancy gear to improve your composition—just a little know-how.
Rule of Thirds
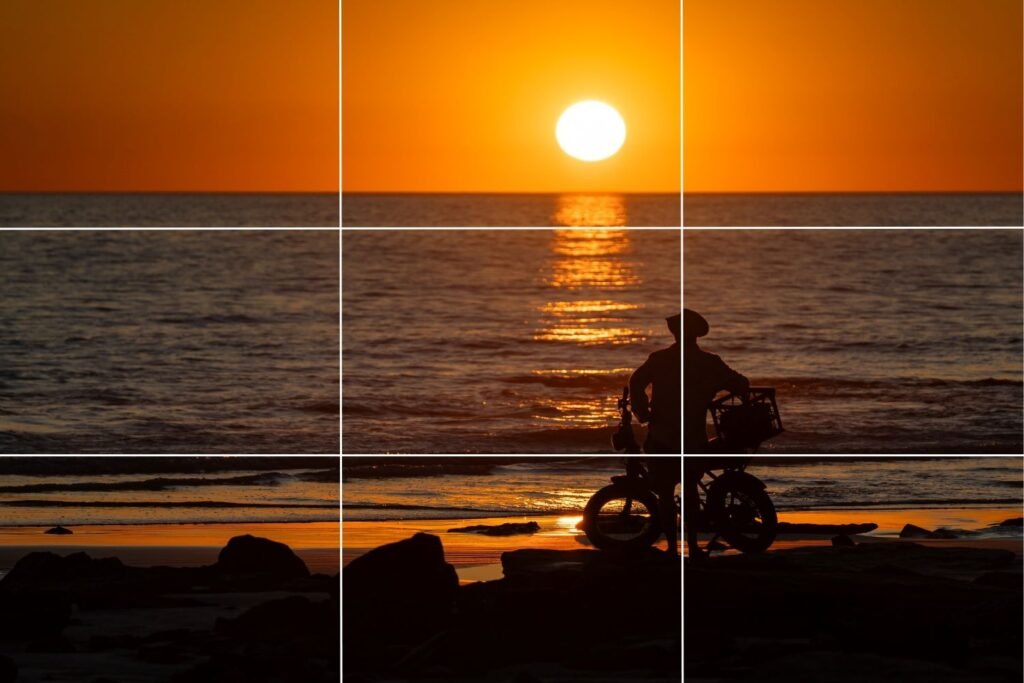
This is one of the easiest and most effective tricks. Imagine your photo split into a grid of nine squares, like a tic-tac-toe board. Instead of placing your subject smack in the middle, try positioning it along one of the grid lines or where the lines intersect. It adds balance and makes the photo more interesting. Most phones and cameras even have a grid option to help you out!
Framing and Symmetry
Using elements in your surroundings to frame your subject—like doorways, windows, or trees—adds depth and focuses attention where you want it. Symmetry is another powerful tool: think of reflections in water or the perfectly aligned architecture of a building. Symmetrical photos are naturally pleasing to the eye.
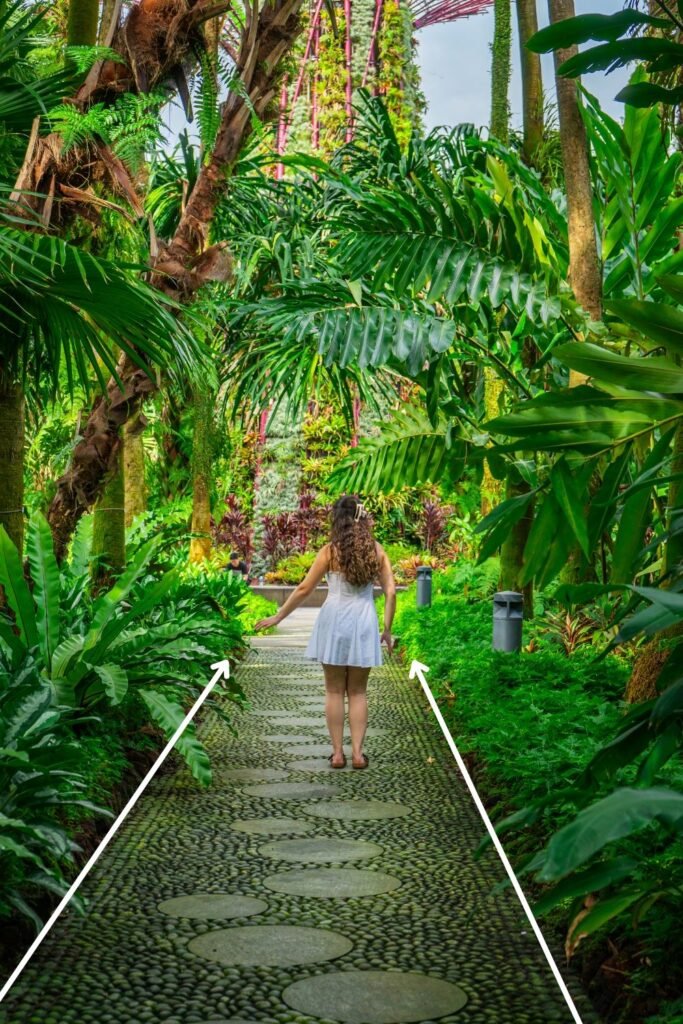
Leading Lines
Ever notice how some photos seem to guide your eyes through the scene? That’s thanks to leading lines. These can be roads, rivers, fences—anything that naturally draws the eye toward your subject. It gives your photos direction and makes them feel more dynamic.
Negative Space
Negative space is just the empty area around your subject. Don’t be afraid to leave some breathing room! It can make your subject stand out even more, creating a minimalist vibe that’s often more powerful than filling the entire frame.
Lighting Techniques
If there’s one thing that can make or break a photo, it’s lighting. Good lighting can turn a simple scene into something magical, while bad lighting can make even the most stunning landscape look flat. The key is to work with the light you have—and sometimes, it’s easier than you think.
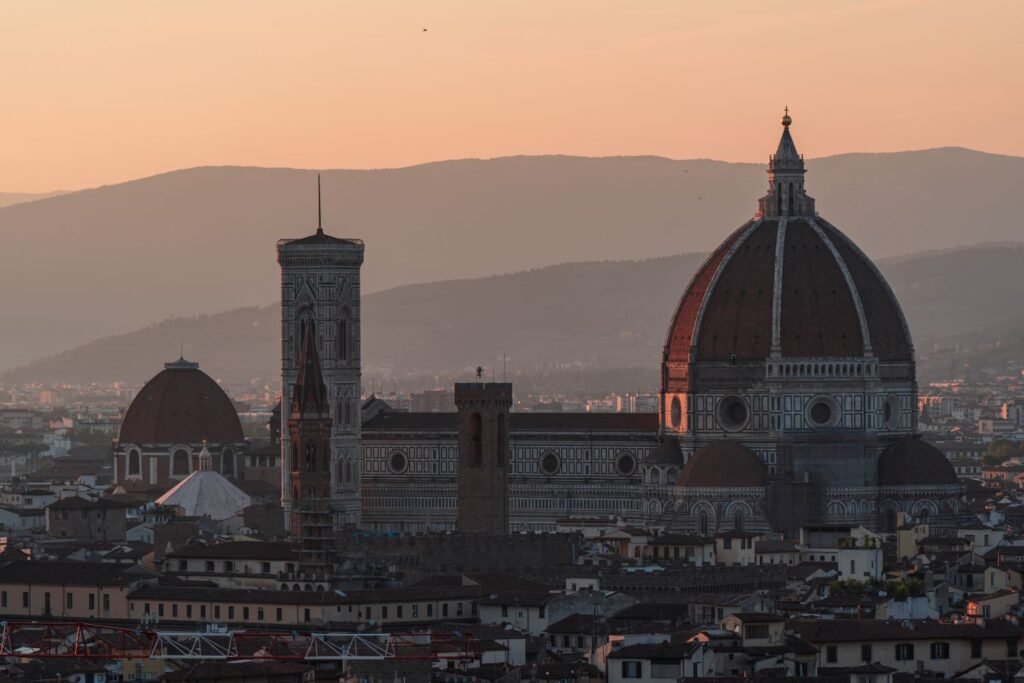
Natural Light
When it comes to natural light, nothing beats the golden hour. That’s the hour right after sunrise or right before sunset when the light is soft, warm, and flattering. Midday sun, on the other hand, can be harsh and create strong shadows, so if you’re shooting during the day, try to find some shade or shoot with the sun behind your subject for a nice backlit effect.
Indoor Lighting
Shooting indoors can be tricky because you’re often dealing with low light or odd color casts from artificial lights. The trick is to position your subject near a window to take advantage of soft, natural light. If the lighting still feels too dim, try bumping up your ISO or using a reflector (or even a white sheet of paper) to bounce light back onto your subject.
Shadows and Highlights
Don’t shy away from shadows! They can add drama and depth to your photos, especially in portraits or landscape shots. On the flip side, pay attention to the highlights—areas of your photo that are very bright. If they’re too blown out, you’ll lose detail in those areas, so it’s a balance. Shooting at times when the light is softer (like during golden hour) can help manage this.
Understanding Depth of Field
Depth of field (DoF) is what makes the background of your photo look either sharp or beautifully blurred. It’s one of those things that can make your subject really pop or keep everything in the scene nice and crisp. Luckily, it’s not as complicated as it sounds.
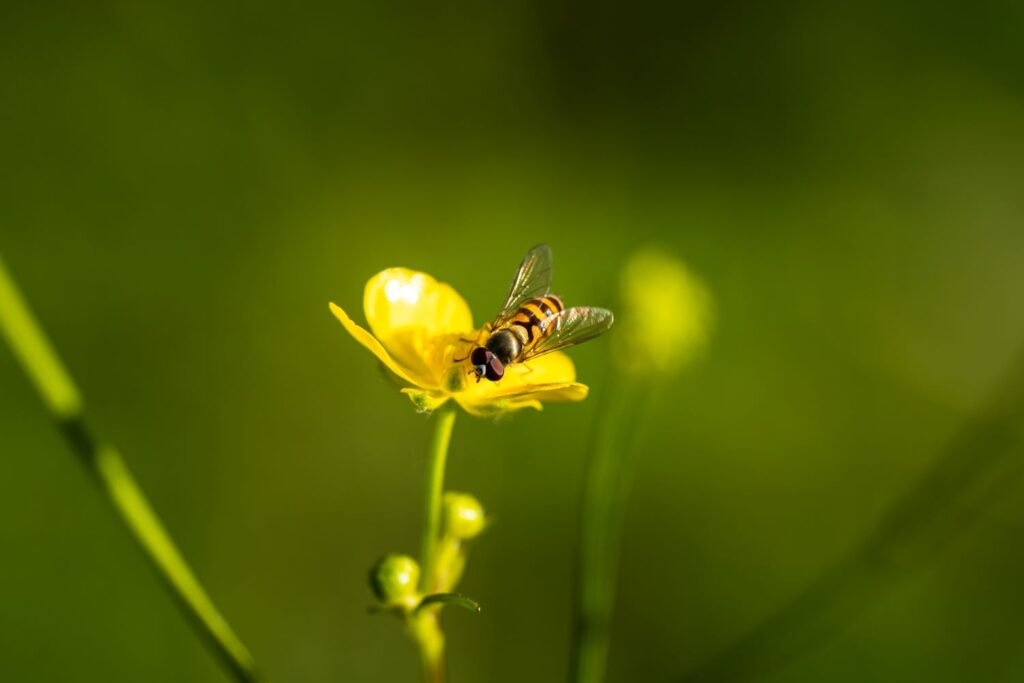
Shallow Depth of Field
This is when your subject is in sharp focus, but everything in the background (and sometimes the foreground) is blurred. You’ve probably seen this in portrait photography, where the person is clear, and the background is dreamy. To achieve this effect, you’ll want a wide aperture (a lower f-stop, like f/1.8 or f/2.8) and to get close to your subject. Smartphones often have a ‘portrait mode’ that mimics this, so you don’t always need a fancy camera.
Deep Depth of Field
On the other hand, if you’re shooting landscapes or group photos where you want everything to be in focus, you’ll need a deep depth of field. This means using a smaller aperture (a higher f-stop, like f/8 or higher) to keep both the foreground and background sharp. It’s perfect for wide scenes where you want to capture every detail.
Bokeh Effect
Here’s where things get a little creative: bokeh. This is the out-of-focus blur in the background, usually in the form of soft, circular lights or shapes. You often see this in night portraits or artistic shots where lights are blurred into glowing orbs. To get great bokeh, use a wide aperture and focus on something close, with lights or patterns in the background.
Editing Your Photos
Even the best photographers don’t always get the perfect shot straight out of the camera—editing is where the magic happens. But editing doesn’t mean completely changing your photo. It’s about enhancing what’s already there and bringing out the best in your shot.
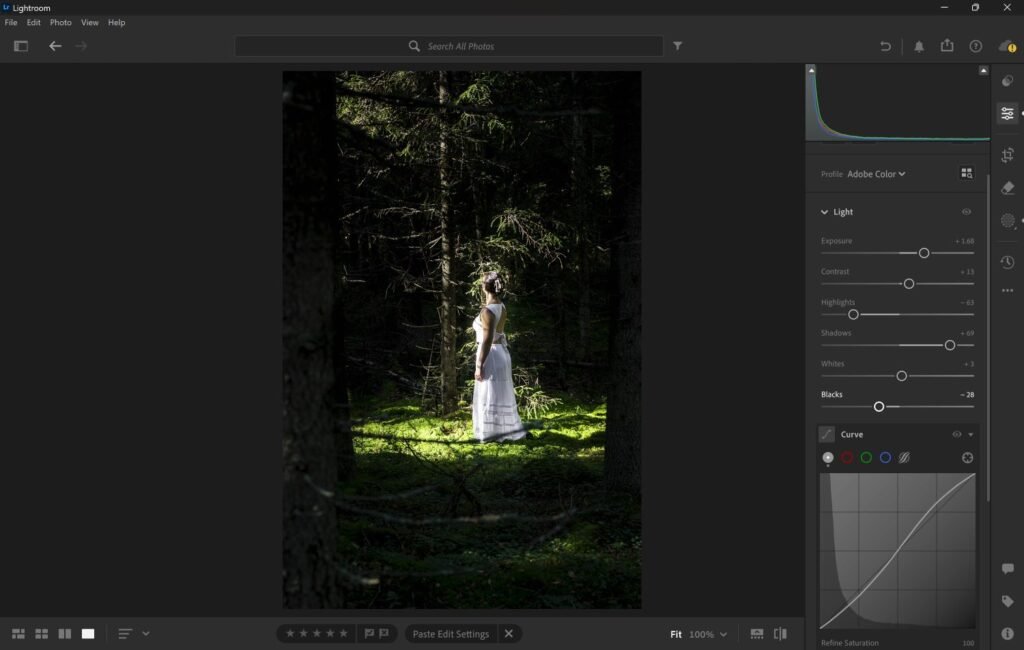
Basic Edits
Let’s start with the essentials. Most photos can benefit from a little tweaking in these areas:
- Exposure: Adjust the brightness to make sure your photo isn’t too dark or too bright. Small changes here can make a huge difference.
- Contrast: This controls the difference between light and dark areas. Boosting contrast can add more depth, while lowering it can give a softer, dreamy effect.
- Cropping: Don’t be afraid to crop your photo to improve composition or remove distractions. A well-cropped photo can feel more balanced and focused.
- Saturation: Adjust this to enhance or tone down colors. Be careful not to overdo it—too much saturation can make your photo look unnatural.
Software Recommendations
You don’t need professional-level software to edit like a pro. Here are a few options depending on what you’re using:
- Lightroom: Great for both beginners and advanced users, Lightroom is perfect for color correction and fine-tuning.
- Snapseed: This free app is a favorite for mobile photographers, offering tons of powerful tools in an easy-to-use interface.
- VSCO: Another popular mobile app, VSCO is known for its filters, but it also has solid editing tools for exposure, contrast, and more.
Consistency in Style
One of the best ways to make your photos stand out is by developing a consistent editing style. Whether you prefer bright and airy, dark and moody, or natural and true-to-life, sticking to a style helps your photos feel cohesive. Over time, this also becomes part of your creative signature—people will recognize your photos just by looking at them.
Tips for Different Types of Photography
Photography isn’t one-size-fits-all. Different subjects call for different techniques, so here are a few tailored tips depending on what you’re shooting.
Portrait Photography
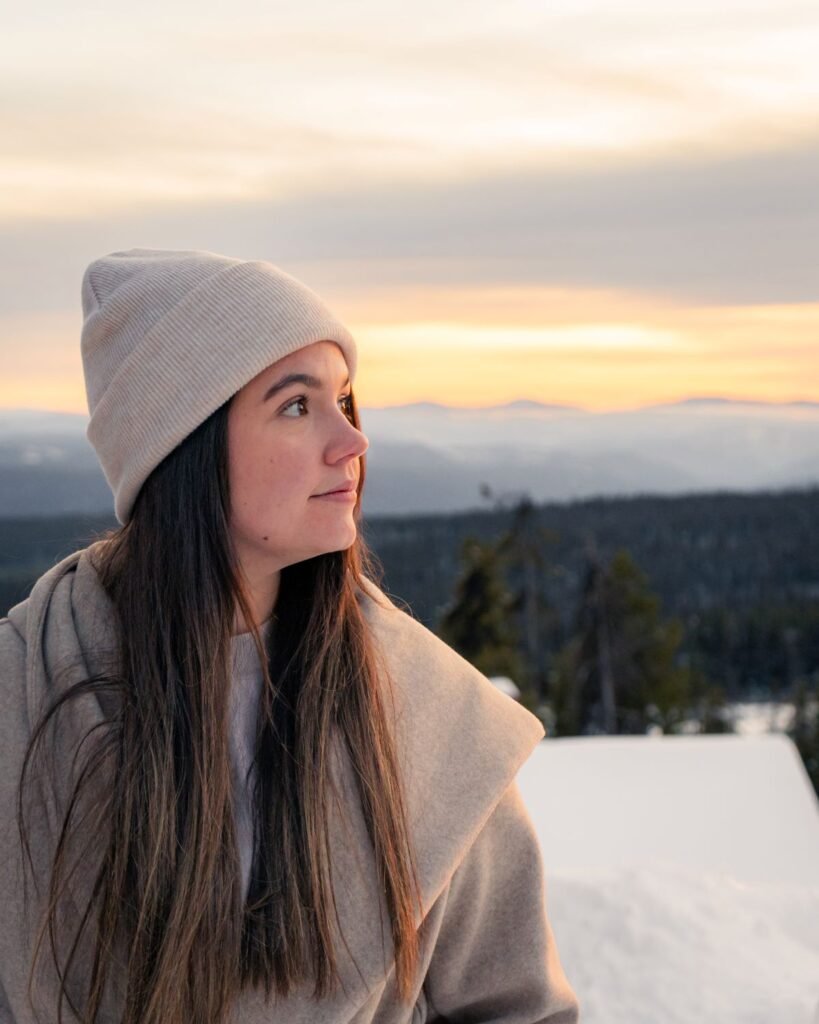
Capturing people can be tricky, but a few adjustments can make a world of difference. First, focus on the eyes. In portraits, sharp eyes are essential, as they draw the viewer in. Second, play around with angles. Shooting from slightly above your subject can create a more flattering perspective, while getting at eye level offers a natural, balanced shot. Lastly, don’t forget about the background. Keep it simple so it doesn’t distract from your subject, or use that shallow depth of field we talked about to blur it out.
Landscape Photography
When you’re shooting landscapes, think big and wide. Use a wide-angle lens (or setting on your phone) to capture the vastness of the scene. Don’t forget about the foreground—adding something in the foreground, like a rock, plant, or person, can give your photo depth and make it feel more three-dimensional. Also, try shooting at sunrise or sunset when the light is softer and adds drama to your landscapes.
Action Photography
Capturing motion—whether it’s sports, wildlife, or just kids running around—requires a fast shutter speed. This freezes the action and keeps everything sharp. If you’re using a smartphone, look for the burst mode feature, which takes multiple photos in quick succession so you can pick the best one. Also, try to anticipate the action—if you know something exciting is about to happen, be ready with your finger on the shutter.
Night Photography
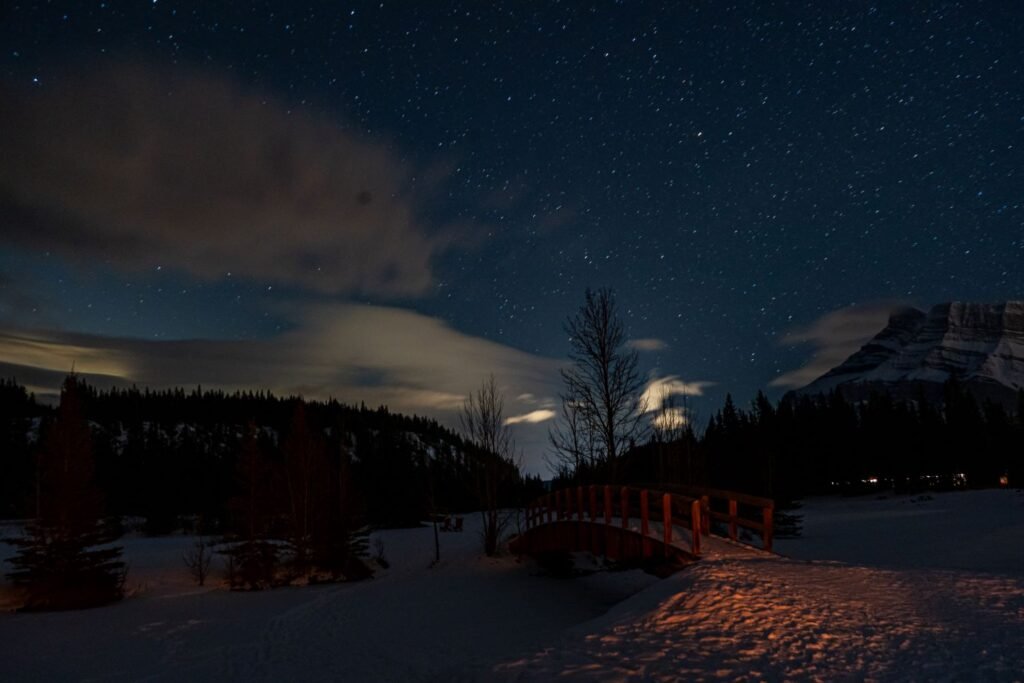
Shooting at night can be challenging but rewarding. Start by using a slower shutter speed to let in more light, but remember to keep your camera steady—using a tripod or propping it on something solid will help avoid blurry shots. You’ll also want to increase your ISO, but not too much, or you’ll end up with grainy images. If your camera has a night mode, give it a try, or use long exposure to capture lights, stars, or even moving traffic.
Gear Recommendations
While you don’t need expensive gear to take great photos, having the right tools can make things easier and help you achieve the results you want. Here’s a quick breakdown of some gear that’s worth considering, depending on what kind of photography you’re into.
Camera and Lens Suggestions
If you’re just starting out, don’t stress about getting the latest camera. Even entry-level DSLRs or mirrorless cameras can produce amazing results. For those ready to invest, something like a Sony a6400 or Canon EOS RP is a great all-rounder. When it comes to lenses, the “nifty fifty” (50mm lens) is perfect for portraits and works wonders in low light. For landscapes, a wide-angle lens (like a 16-35mm) lets you capture the full scene. We personally use the Sony A7 Mark III (and kit lens) as well as the Sony FE 70-200mm F4 Macro G OSS II Lens.

Tripods
A good tripod is essential for long exposures, night photography, or any situation where you need stability. There are plenty of lightweight, portable tripods that won’t break the bank, like the Manfrotto Compact Action or Joby GorillaPod for more flexibility.
Filters
Filters can enhance your photos in subtle but powerful ways. A polarizing filter helps reduce reflections and makes colors pop, while a neutral density (ND) filter is great for long exposures during the day—think smooth waterfalls or dreamy seascapes.
Other Accessories
- Remote Shutter Release: Avoid camera shake by using a remote or a timer for long exposures.
- External Lighting: If you’re shooting indoors or at night, a small LED light or a portable softbox can make a huge difference.
- Editing Software: We touched on this earlier, but investing in good editing software, like Adobe Lightroom, gives you much more control over your photos.
Common Mistakes to Avoid
Everyone makes mistakes when they’re learning, but knowing what to look out for can help you avoid some common pitfalls in photography. Here are a few things to keep in mind next time you’re out shooting.
Over-editing
It’s easy to get carried away when you’re editing, but too much editing can actually hurt your photo. Oversaturated colors, too much sharpening, or extreme contrast adjustments can make an image look unnatural. The key is subtlety—small tweaks often have a bigger impact than drastic changes. Aim for a natural look that enhances the photo, not one that overpowers it.
Ignoring Composition
No matter how interesting your subject is, a poorly composed shot can leave it looking flat. Don’t forget to apply basic composition rules like the rule of thirds, leading lines, and framing. Also, watch out for distracting elements in the background. A cluttered or messy background can take the attention away from your subject.
Neglecting Lighting
Lighting is crucial, and shooting in poor light can make your photos look dull or washed out. Pay attention to the light source, whether it’s natural or artificial. Try to shoot in soft light, like during golden hour, and avoid harsh midday sun unless you’re working with shade. Remember, you can always move your subject or change your angle to get better light.
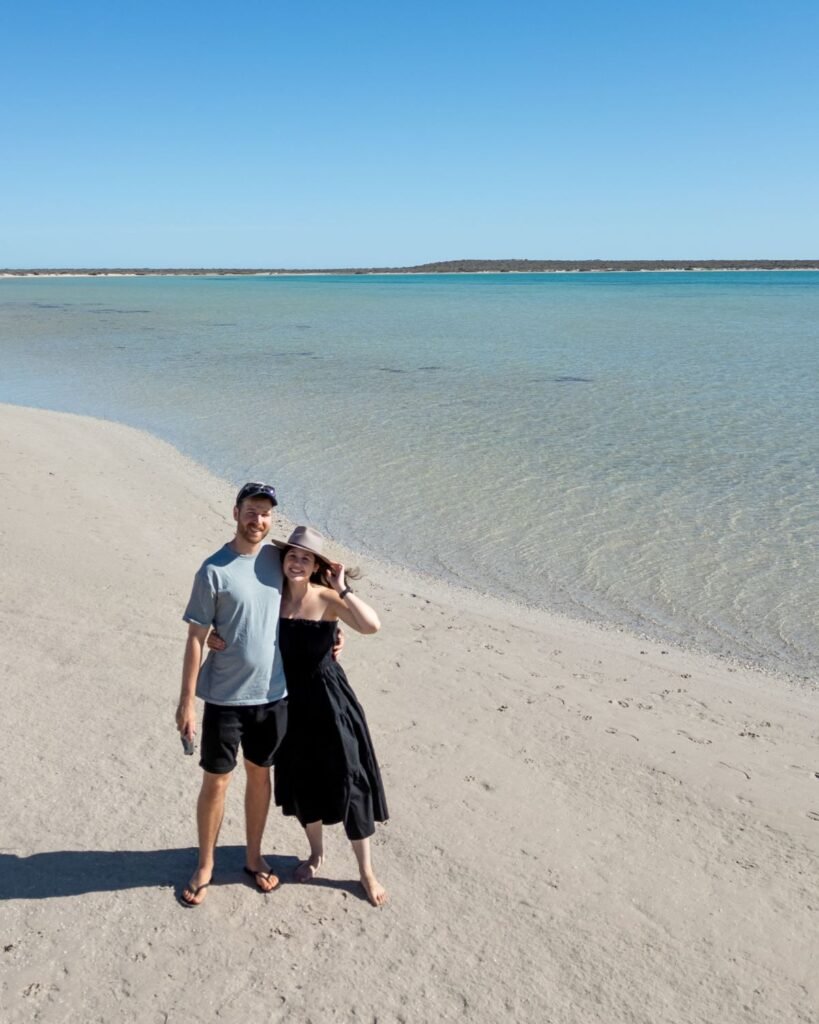
We took this photo quite late in the morning, and as you can see, the colours just aren’t what you’d get from a sunrise/sunset photo
Not Checking Focus
Blurry photos are one of the most common frustrations, and they often happen because the camera didn’t focus where you wanted. Take an extra second to double-check that your focus is sharp, especially on important details like a person’s eyes or the main subject in a landscape. If your camera allows it, use focus peaking or zoom in on the screen to ensure sharpness before you hit the shutter.
Relying Too Much on Auto Mode
Auto mode is great for quick shots, but it often doesn’t give you the best results. Don’t be afraid to switch to manual or semi-automatic modes (like aperture priority or shutter priority) to have more control over the final image. Learning to tweak your settings is a game-changer and can make a noticeable difference in your photos.
Conclusion
Improving your photography doesn’t have to be overwhelming or require expensive gear. Whether you’re just starting out or looking to fine-tune your skills, the key is to practice, experiment, and keep learning. Small adjustments—like paying attention to composition, understanding your camera’s settings, and using good lighting—can make a world of difference in your photos.
Don’t worry if things don’t turn out perfect right away. Photography is all about capturing moments and telling stories, and sometimes that means embracing the imperfections. The more you shoot, the more you’ll develop your own style, and soon, you’ll be taking shots that you’re proud to share.
So grab your camera, get out there, and start experimenting! And if you have any questions or want to share your progress, feel free to drop a comment below or connect with us on social media—I’d love to see what you’re creating.
Frequently Asked Questions
1. What’s the easiest way to improve my photos right away?
Start with composition. Apply the rule of thirds, experiment with leading lines, and avoid cluttered backgrounds. These small adjustments can make a huge impact on how your photos look.
2. Do I need a fancy camera to take good photos?
Not at all! Many smartphones have fantastic cameras these days, and they’re more than enough to take great photos. The key is knowing how to use your camera’s features and focusing on things like lighting and composition.
3. What’s the best time of day to take photos?
Golden hour—the hour after sunrise or before sunset—is usually the best time because the light is soft and flattering. But if you’re shooting in the middle of the day, look for shade to avoid harsh shadows.
4. How can I get that blurred background effect?
The blurred background effect (also called bokeh) is easiest to achieve with a wide aperture (a lower f-stop number, like f/1.8 or f/2.8). If you’re using a smartphone, portrait mode can mimic this effect pretty well.
5. How do I avoid grainy photos in low light?
Grain (or noise) happens when your camera uses a high ISO setting in low light. To reduce this, try using a tripod so you can keep the ISO lower while using a slower shutter speed. You can also edit the photo afterward to reduce noise.
6. What editing apps should I use on my phone?
For mobile editing, apps like Snapseed, Lightroom Mobile, and VSCO are great options. They offer a lot of control over things like exposure, contrast, and color adjustments while being easy to use.
7. What’s the best way to keep my photos consistent?
Consistency comes from both shooting and editing with a style in mind. When editing, try to stick to similar settings for exposure, contrast, and color tones. Developing a consistent editing style will help your photos look cohesive.
8. Should I always use manual mode on my camera?
Manual mode gives you the most control, but it’s not always necessary. If you’re new to photography, you can start with semi-automatic modes like aperture priority or shutter priority, which offer more control without being overwhelming.
